Class TreeTableView<S>
- Type Parameters:
S- The type of the TreeItem instances used in this TreeTableView.
- All Implemented Interfaces:
Styleable,EventTarget,Skinnable
TreeView and TableView controls,
and as you read on you'll come to see the APIs are largely the same.
However, to give a high-level overview, you'll note that the TreeTableView
uses the same TreeItem API as TreeView,
and that you therefore are required to simply set the
root node in the TreeTableView. Similarly, the
TreeTableView control makes use of the same TableColumn-based approach that
the TableView control uses, except instead of using the
TableView-specific TableColumn class, you should instead use the
TreeTableView-specific TreeTableColumn class instead. For an
example on how to create a TreeTableView instance, refer to the 'Creating a
TreeTableView' control section below.
As with the TableView control, the TreeTableView control has a
number of features, including:
- Powerful
TreeTableColumnAPI:- Support for
cell factoriesto easily customizecellcontents in both rendering and editing states. - Specification of
minWidth/prefWidth/maxWidth, and alsofixed width columns. - Width resizing by the user at runtime.
- Column reordering by the user at runtime.
- Built-in support for
column nesting
- Support for
- Different
resizing policiesto dictate what happens when the user resizes columns. - Support for
multiple column sortingby clicking the column header (hold down Shift keyboard key whilst clicking on a header to sort by multiple columns).
Creating a TreeTableView
Creating a TreeTableView is a multi-step process, and also depends on the underlying data model needing to be represented. For this example we'll use the TreeTableView to visualise a file system, and will therefore make use of an imaginary (and vastly simplified) File class as defined below:
 public class File {
     private StringProperty name;
     public void setName(String value) { nameProperty().set(value); }
     public String getName() { return nameProperty().get(); }
     public StringProperty nameProperty() {
         if (name == null) name = new SimpleStringProperty(this, "name");
         return name;
     }

     private LongProperty lastModified;
     public void setLastModified(long value) { lastModifiedProperty().set(value); }
     public long getLastModified() { return lastModifiedProperty().get(); }
     public LongProperty lastModifiedProperty() {
         if (lastModified == null) lastModified = new SimpleLongProperty(this, "lastModified");
         return lastModified;
     }

     public File(String name, long size) {
         setName(name);
         setSize(size);
     }
 }
The data we will use for this example is a single root with 3 files:
 File rootFile = new File("Images", 900);
 List<File> files = List.of(
     new File("Cat.png", 300),
     new File("Dog.png", 500),
     new File("Bird.png", 100));
Firstly, we need to create a data model. As mentioned, for this example, we'll be representing a file system using File instances. To do this, we need to define the root node of the tree table and its hierarchy:
 TreeItem<File> root = new TreeItem<>(rootFile);
 files.forEach(file -> root.getChildren().add(new TreeItem<>(file)));
Then we create a TreeTableView instance:
TreeTableView<File> treeTable = new TreeTableView<>(root);
With the root set as such, the TreeTableView will automatically update whenever
the children of the root change.
At this point we have a TreeTableView hooked up to observe the root
TreeItem instance. The missing ingredient
now is the means of splitting out the data contained within the model and
representing it in one or more TreeTableColumn instances. To
create a two-column TreeTableView to show the file name and size
properties, we write:
 TreeTableColumn<File, String> fileNameCol = new TreeTableColumn<>("Filename");
 TreeTableColumn<File, Long> sizeCol = new TreeTableColumn<>("Size");

 treeTable.getColumns().setAll(fileNameCol, sizeCol);
With the code shown above we have nearly fully defined the minimum properties
required to create a TreeTableView instance. The only thing missing is the
cell value factories
for the two columns - it is these that are responsible for determining the value
of a cell in a given row. Commonly these can be specified using the
TreeItemPropertyValueFactory class, but
failing that you can also create an anonymous inner class and do whatever is
necessary. For example, using TreeItemPropertyValueFactory
you would do the following:
 fileNameCol.setCellValueFactory(new TreeItemPropertyValueFactory(rootFile.nameProperty().getName()));
 sizeCol.setCellValueFactory(new TreeItemPropertyValueFactory(rootFile.sizeProperty().getName()));
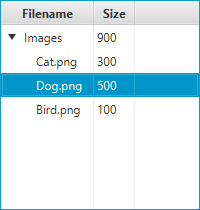
Running this code will result in a TreeTableView as shown above with two columns for name and size. Any other properties the File class might have will not be shown, as no TreeTableColumns are defined for them.
TreeTableView support for classes that don't contain properties
The code shown above is the shortest possible code for creating a TreeTableView
when the domain objects are designed with JavaFX properties in mind
(additionally, TreeItemPropertyValueFactory supports
normal JavaBean properties too, although there is a caveat to this, so refer
to the class documentation for more information). When this is not the case,
it is necessary to provide a custom cell value factory. More information
about cell value factories can be found in the TreeTableColumn API
documentation, but briefly, here is how a TreeTableColumns could be specified:
 firstNameCol.setCellValueFactory(new Callback<CellDataFeatures<Person, String>, ObservableValue<String>>() {
     public ObservableValue<String> call(CellDataFeatures<Person, String> p) {
         // p.getValue() returns the TreeItem<Person> instance for a particular TreeTableView row,
         // p.getValue().getValue() returns the Person instance inside the TreeItem<Person>
         return p.getValue().getValue().firstNameProperty();
     }
 });

 // or with a lambda expression:
 firstNameCol.setCellValueFactory(p -> p.getValue().getValue().firstNameProperty());
TreeTableView Selection / Focus APIs
To track selection and focus, it is necessary to become familiar with the
SelectionModel and FocusModel classes. A TreeTableView has at most
one instance of each of these classes, available from
selectionModel and
focusModel properties, respectively.
Whilst it is possible to use this API to set a new selection model, in
most circumstances this is not necessary - the default selection and focus
models should work in most circumstances.
The default SelectionModel used when instantiating a TreeTableView is
an implementation of the MultipleSelectionModel abstract class.
However, as noted in the API documentation for
the selectionMode
property, the default value is SelectionMode.SINGLE. To enable
multiple selection in a default TreeTableView instance, it is therefore necessary
to do the following:
treeTableView.getSelectionModel().setSelectionMode(SelectionMode.MULTIPLE);
Customizing TreeTableView Visuals
The visuals of the TreeTableView can be entirely customized by replacing the
default row factory. A row factory is used to
generate TreeTableRow instances, which are used to represent an entire
row in the TreeTableView.
In many cases, this is not what is desired however, as it is more commonly
the case that cells be customized on a per-column basis, not a per-row basis.
It is therefore important to note that a TreeTableRow is not a
TreeTableCell. A TreeTableRow is simply a container for zero or more
TreeTableCell, and in most circumstances it is more likely that you'll
want to create custom TreeTableCells, rather than TreeTableRows. The primary use case
for creating custom TreeTableRow instances would most probably be to introduce
some form of column spanning support.
You can create custom TreeTableCell instances per column by assigning
the appropriate function to the TreeTableColumns
cell factory property.
See the Cell class documentation for a more complete
description of how to write custom Cells.
Warning: Nodes should not be inserted directly into the TreeTableView cells
TreeTableView allows for it's cells to contain elements of any type, including
Node instances. Putting nodes into
the TreeTableView cells is strongly discouraged, as it can
lead to unexpected results.
Important points to note:
- Avoid inserting
Nodeinstances directly into theTreeTableViewcells or its data model. - The recommended approach is to put the relevant information into the items list, and
provide a custom
cell factoryto create the nodes for a given cell and update them on demand using the data stored in the item for that cell. - Avoid creating new
Nodes in theupdateItemmethod of a customcell factory.
The following minimal example shows how to create a custom cell factory for TreeTableView containing Nodes:
  class ColorModel {
    private SimpleObjectProperty<Color> color;
    private StringProperty name;

    public ColorModel (String name, Color col) {
      this.color = new SimpleObjectProperty<Color>(col);
      this.name = new SimpleStringProperty(name);
    }

    public Color getColor() { return color.getValue(); }
    public void setColor(Color c) { color.setValue(c); }
    public SimpleObjectProperty<Color> colorProperty() { return color; }

    public String getName() { return name.getValue(); }
    public void setName(String s) { name.setValue(s); }
    public StringProperty nameProperty() { return name; }
  }

  ColorModel rootModel = new ColorModel("Color", Color.WHITE);
  TreeItem<ColorModel> treeRoot = new TreeItem<ColorModel>(rootModel);
  treeRoot.setExpanded(true);
  treeRoot.getChildren().addAll(
      new TreeItem<ColorModel>(new ColorModel("Red", Color.RED)),
      new TreeItem<ColorModel>(new ColorModel("Green", Color.GREEN)),
      new TreeItem<ColorModel>(new ColorModel("Blue", Color.BLUE)));

  TreeTableView<ColorModel> treeTable = new TreeTableView<ColorModel>(treeRoot);

  TreeTableColumn<ColorModel, String> nameCol = new TreeTableColumn<>("Color Name");
  TreeTableColumn<ColorModel, Color> colorCol = new TreeTableColumn<>("Color");

  treeTable.getColumns().setAll(nameCol, colorCol);

  colorCol.setCellValueFactory(p -> p.getValue().getValue().colorProperty());
  nameCol.setCellValueFactory(p -> p.getValue().getValue().nameProperty());

  colorCol.setCellFactory(p -> {
      return new TreeTableCell<ColorModel, Color> () {
          private final Rectangle rectangle;
          {
              setContentDisplay(ContentDisplay.GRAPHIC_ONLY);
              rectangle = new Rectangle(10, 10);
          }

          @Override
          protected void updateItem(Color item, boolean empty) {
              super.updateItem(item, empty);

              if (item == null || empty) {
                  setGraphic(null);
              } else {
                  rectangle.setFill(item);
                  setGraphic(rectangle);
              }
          }
      };
  });
This example has an anonymous custom TreeTableCell class in the custom cell factory.
Note that the Rectangle (Node) object needs to be created in the instance initialization block
or the constructor of the custom TreeTableCell class and updated/used in its updateItem method.
Editing
This control supports inline editing of values, and this section attempts to give an overview of the available APIs and how you should use them.
Firstly, cell editing most commonly requires a different user interface
than when a cell is not being edited. This is the responsibility of the
Cell implementation being used. For TreeTableView, it is highly
recommended that editing be
per-TreeTableColumn,
rather than per row, as more often than not
you want users to edit each column value differently, and this approach allows
for editors specific to each column. It is your choice whether the cell is
permanently in an editing state (e.g. this is common for CheckBox cells),
or to switch to a different UI when editing begins (e.g. when a double-click
is received on a cell).
To know when editing has been requested on a cell,
simply override the Cell.startEdit() method, and
update the cell text and
graphic properties as
appropriate (e.g. set the text to null and set the graphic to be a
TextField). Additionally, you should also override
Cell.cancelEdit() to reset the UI back to its original visual state
when the editing concludes. In both cases it is important that you also
ensure that you call the super method to have the cell perform all duties it
must do to enter or exit its editing mode.
Once your cell is in an editing state, the next thing you are most probably
interested in is how to commit or cancel the editing that is taking place. This is your
responsibility as the cell factory provider. Your cell implementation will know
when the editing is over, based on the user input (e.g. when the user presses
the Enter or ESC keys on their keyboard). When this happens, it is your
responsibility to call Cell.commitEdit(Object) or
Cell.cancelEdit(), as appropriate.
When you call Cell.commitEdit(Object) an event is fired to the
TreeTableView, which you can observe by adding an EventHandler via
TreeTableColumn.setOnEditCommit(javafx.event.EventHandler). Similarly,
you can also observe edit events for
edit start
and edit cancel.
By default the TreeTableColumn edit commit handler is non-null, with a default
handler that attempts to overwrite the property value for the
item in the currently-being-edited row. It is able to do this as the
Cell.commitEdit(Object) method is passed in the new value, and this
is passed along to the edit commit handler via the
CellEditEvent that is
fired. It is simply a matter of calling
TreeTableColumn.CellEditEvent.getNewValue() to
retrieve this value.
It is very important to note that if you call
TreeTableColumn.setOnEditCommit(javafx.event.EventHandler) with your own
EventHandler, then you will be removing the default handler. Unless
you then handle the writeback to the property (or the relevant data source),
nothing will happen. You can work around this by using the
EventTarget.addEventHandler(javafx.event.EventType, javafx.event.EventHandler)
method to add a TreeTableColumn.EDIT_COMMIT_EVENT EventType with
your desired EventHandler as the second argument. Using this method,
you will not replace the default implementation, but you will be notified when
an edit commit has occurred.
Hopefully this summary answers some of the commonly asked questions. Fortunately, JavaFX ships with a number of pre-built cell factories that handle all the editing requirements on your behalf. You can find these pre-built cell factories in the javafx.scene.control.cell package.
- Since:
- JavaFX 8.0
- See Also:
-
Nested Class Summary
Nested ClassesModifier and TypeClassDescriptionstatic classAnEventsubclass used specifically in TreeTableView for representing edit-related events.static classAn immutable wrapper class for use in the TableViewcolumn resizefunctionality.static classAFocusModelwith additional functionality to support the requirements of a TableView control.static classA simple extension of theSelectionModelabstract class to allow for special support for TreeTableView controls. -
Property Summary
PropertiesTypePropertyDescriptionThis is the function called when the user completes a column-resize operation.final ReadOnlyObjectProperty<Comparator<TreeItem<S>>> The comparator property is a read-only property that is representative of the current state of thesort orderlist.final BooleanPropertySpecifies whether this TreeTableView is editable - only if the TreeTableView and the TreeCells within it are both editable will a TreeCell be able to go into their editing state.final ReadOnlyObjectProperty<TreeTablePosition<S, ?>> Represents the current cell being edited, or null if there is no cell being edited.final ReadOnlyIntegerPropertyRepresents the number of tree nodes presently able to be visible in the TreeTableView.final DoublePropertySpecifies whether this control has cells that are a fixed height (of the specified value).The FocusModel provides the API through which it is possible to control focus on zero or one rows of the TreeTableView.final ObjectProperty<EventHandler<ScrollToEvent<TreeTableColumn<S, ?>>>> Called when there's a request to scroll a column into view usingscrollToColumn(TreeTableColumn)orscrollToColumnIndex(int)final ObjectProperty<EventHandler<ScrollToEvent<Integer>>> Called when there's a request to scroll an index into view usingscrollTo(int)final ObjectProperty<EventHandler<SortEvent<TreeTableView<S>>>> Called when there's a request to sort the control.final ObjectProperty<Node> This Node is shown to the user when the table has no content to show.final ObjectProperty<TreeItem<S>> Property representing the root node of the TreeTableView.final ObjectProperty<Callback<TreeTableView<S>, TreeTableRow<S>>> A function which produces a TreeTableRow.The SelectionModel provides the API through which it is possible to select single or multiple items within a TreeTableView, as well as inspect which rows have been selected by the user.final BooleanPropertyProperty that represents whether or not the TreeTableView root node is visible.final ObjectProperty<TreeSortMode> Specifies the sort mode to use when sorting the contents of this TreeTableView, should any columns be specified in thesort orderlist.final ObjectProperty<Callback<TreeTableView<S>, Boolean>> The sort policy specifies how sorting in this TreeTableView should be performed.final BooleanPropertyThis controls whether a menu button is available when the user clicks in a designated space within the TableView, within which is a radio menu item for each TreeTableColumn in this table.final ObjectProperty<TreeTableColumn<S, ?>> Property that represents which column should have the disclosure node shown in it (that is, the column with the arrow).Properties declared in class javafx.scene.control.Control
contextMenu, skin, tooltipProperties declared in class javafx.scene.layout.Region
background, border, cacheShape, centerShape, height, insets, maxHeight, maxWidth, minHeight, minWidth, opaqueInsets, padding, prefHeight, prefWidth, scaleShape, shape, snapToPixel, widthProperties declared in class javafx.scene.Parent
needsLayoutProperties declared in class javafx.scene.Node
accessibleHelp, accessibleRoleDescription, accessibleRole, accessibleText, blendMode, boundsInLocal, boundsInParent, cacheHint, cache, clip, cursor, depthTest, disabled, disable, effectiveNodeOrientation, effect, eventDispatcher, focused, focusTraversable, focusVisible, focusWithin, hover, id, inputMethodRequests, layoutBounds, layoutX, layoutY, localToParentTransform, localToSceneTransform, managed, mouseTransparent, nodeOrientation, onContextMenuRequested, onDragDetected, onDragDone, onDragDropped, onDragEntered, onDragExited, onDragOver, onInputMethodTextChanged, onKeyPressed, onKeyReleased, onKeyTyped, onMouseClicked, onMouseDragEntered, onMouseDragExited, onMouseDragged, onMouseDragOver, onMouseDragReleased, onMouseEntered, onMouseExited, onMouseMoved, onMousePressed, onMouseReleased, onRotate, onRotationFinished, onRotationStarted, onScrollFinished, onScroll, onScrollStarted, onSwipeDown, onSwipeLeft, onSwipeRight, onSwipeUp, onTouchMoved, onTouchPressed, onTouchReleased, onTouchStationary, onZoomFinished, onZoom, onZoomStarted, opacity, parent, pickOnBounds, pressed, rotate, rotationAxis, scaleX, scaleY, scaleZ, scene, style, translateX, translateY, translateZ, viewOrder, visible -
Field Summary
FieldsModifier and TypeFieldDescriptionstatic final Callback<TreeTableView.ResizeFeatures, Boolean> Deprecated.static final Callback<TreeTableView.ResizeFeatures, Boolean> A resize policy that adjusts other columns in order to fit the tree table width.static final Callback<TreeTableView.ResizeFeatures, Boolean> A resize policy that adjusts columns, starting with the last one, in order to fit the table width.static final Callback<TreeTableView.ResizeFeatures, Boolean> A resize policy that adjusts columns, starting with the next one, in order to fit the tree table width.static final Callback<TreeTableView.ResizeFeatures, Boolean> A resize policy that adjusts the last column in order to fit the tree table width.static final Callback<TreeTableView.ResizeFeatures, Boolean> A resize policy that adjusts the next column in order to fit the tree table width.static final Callback<TreeTableView.ResizeFeatures, Boolean> A resize policy that adjusts subsequent columns in order to fit the tree table width.static final Callback<TreeTableView, Boolean> The defaultsort policythat this TreeTableView will use if no other policy is specified.static final Callback<TreeTableView.ResizeFeatures, Boolean> Very simple resize policy that just resizes the specified column by the provided delta and shifts all other columns (to the right of the given column) further to the right (when the delta is positive) or to the left (when the delta is negative).Fields declared in class javafx.scene.layout.Region
USE_COMPUTED_SIZE, USE_PREF_SIZEFields declared in class javafx.scene.Node
BASELINE_OFFSET_SAME_AS_HEIGHT -
Constructor Summary
ConstructorsConstructorDescriptionCreates an empty TreeTableView.TreeTableView(TreeItem<S> root) Creates a TreeTableView with the provided root node. -
Method Summary
Modifier and TypeMethodDescriptionThis is the function called when the user completes a column-resize operation.final ReadOnlyObjectProperty<Comparator<TreeItem<S>>> The comparator property is a read-only property that is representative of the current state of thesort orderlist.voidedit(int row, TreeTableColumn<S, ?> column) Causes the cell at the given row/column view indexes to switch into its editing state, if it is not already in it, and assuming that the TableView and column are also editable.final BooleanPropertySpecifies whether this TreeTableView is editable - only if the TreeTableView and the TreeCells within it are both editable will a TreeCell be able to go into their editing state.static <S> EventType<TreeTableView.EditEvent<S>> An EventType that indicates some edit event has occurred.static <S> EventType<TreeTableView.EditEvent<S>> An EventType used to indicate that an edit event has just been canceled within the TreeTableView upon which the event was fired.static <S> EventType<TreeTableView.EditEvent<S>> An EventType that is used to indicate that an edit in a TreeTableView has been committed.final ReadOnlyObjectProperty<TreeTablePosition<S, ?>> Represents the current cell being edited, or null if there is no cell being edited.static <S> EventType<TreeTableView.EditEvent<S>> An EventType used to indicate that an edit event has started within the TreeTableView upon which the event was fired.final ReadOnlyIntegerPropertyRepresents the number of tree nodes presently able to be visible in the TreeTableView.final DoublePropertySpecifies whether this control has cells that are a fixed height (of the specified value).The FocusModel provides the API through which it is possible to control focus on zero or one rows of the TreeTableView.static List<CssMetaData<? extends Styleable, ?>> Gets theCssMetaDataassociated with this class, which may include theCssMetaDataof its superclasses.Gets the value of thecolumnResizePolicyproperty.final ObservableList<TreeTableColumn<S, ?>> The TreeTableColumns that are part of this TableView.final Comparator<TreeItem<S>> Gets the value of thecomparatorproperty.List<CssMetaData<? extends Styleable, ?>> Gets the unmodifiable list of the control's CSS-styleable properties.final TreeTablePosition<S, ?> Gets the value of theeditingCellproperty.final intGets the value of theexpandedItemCountproperty.final doubleReturns the fixed cell size value.Returns the currently installedFocusModel.static intgetNodeLevel(TreeItem<?> node) Deprecated.This method does not correctly calculate the distance from the given TreeItem to the root of the TreeTableView.final EventHandler<ScrollToEvent<Integer>> Gets the value of theonScrollToproperty.final EventHandler<ScrollToEvent<TreeTableColumn<S, ?>>> Gets the value of theonScrollToColumnproperty.final EventHandler<SortEvent<TreeTableView<S>>> Gets the value of theonSortproperty.final NodeGets the value of theplaceholderproperty.getRoot()Returns the current root node of this TreeTableView, or null if no root node is specified.intReturns the index position of the given TreeItem, assuming that it is currently accessible through the tree hierarchy (most notably, that all parent tree items are expanded).final Callback<TreeTableView<S>, TreeTableRow<S>> Gets the value of therowFactoryproperty.Returns the currently installed selection model.final TreeSortModeGets the value of thesortModeproperty.final ObservableList<TreeTableColumn<S, ?>> The sortOrder list defines the order in whichTreeTableColumninstances are sorted.final Callback<TreeTableView<S>, Boolean> Gets the value of thesortPolicyproperty.final TreeTableColumn<S, ?> Gets the value of thetreeColumnproperty.getTreeItem(int row) Returns the TreeItem in the given index, or null if it is out of bounds.intgetTreeItemLevel(TreeItem<?> node) Returns the number of levels of 'indentation' of the given TreeItem, based on how many times getParent() can be recursively called.TreeTableColumn<S, ?> getVisibleLeafColumn(int column) Returns the TreeTableColumn in the given column index, relative to all other visible leaf columns.Returns an unmodifiable list containing the currently visible leaf columns.intgetVisibleLeafIndex(TreeTableColumn<S, ?> column) Returns the position of the given column, relative to all other visible leaf columns.final booleanGets the value of theeditableproperty.final booleanReturns true if the root of the TreeTableView should be shown, and false if it should not.final booleanGets the value of thetableMenuButtonVisibleproperty.final ObjectProperty<EventHandler<ScrollToEvent<TreeTableColumn<S, ?>>>> Called when there's a request to scroll a column into view usingscrollToColumn(TreeTableColumn)orscrollToColumnIndex(int)final ObjectProperty<EventHandler<ScrollToEvent<Integer>>> Called when there's a request to scroll an index into view usingscrollTo(int)final ObjectProperty<EventHandler<SortEvent<TreeTableView<S>>>> Called when there's a request to sort the control.final ObjectProperty<Node> This Node is shown to the user when the table has no content to show.voidrefresh()Callingrefresh()forces the TreeTableView control to recreate and repopulate the cells necessary to populate the visual bounds of the control.booleanresizeColumn(TreeTableColumn<S, ?> column, double delta) Applies the currently installed resize policy against the given column, resizing it based on the delta value provided.final ObjectProperty<TreeItem<S>> Property representing the root node of the TreeTableView.final ObjectProperty<Callback<TreeTableView<S>, TreeTableRow<S>>> A function which produces a TreeTableRow.voidscrollTo(int index) Scrolls the TreeTableView such that the item in the given index is visible to the end user.voidscrollToColumn(TreeTableColumn<S, ?> column) Scrolls the TreeTableView so that the given column is visible within the viewport.voidscrollToColumnIndex(int columnIndex) Scrolls the TreeTableView so that the given index is visible within the viewport.The SelectionModel provides the API through which it is possible to select single or multiple items within a TreeTableView, as well as inspect which rows have been selected by the user.final voidSets the value of thecolumnResizePolicyproperty.final voidsetEditable(boolean value) Sets the value of theeditableproperty.final voidsetFixedCellSize(double value) Sets the new fixed cell size for this control.final voidSets theFocusModelto be used in the TreeTableView.final voidsetOnScrollTo(EventHandler<ScrollToEvent<Integer>> value) Sets the value of theonScrollToproperty.final voidsetOnScrollToColumn(EventHandler<ScrollToEvent<TreeTableColumn<S, ?>>> value) Sets the value of theonScrollToColumnproperty.final voidsetOnSort(EventHandler<SortEvent<TreeTableView<S>>> value) Sets the value of theonSortproperty.final voidsetPlaceholder(Node value) Sets the value of theplaceholderproperty.final voidSets the root node in this TreeTableView.final voidsetRowFactory(Callback<TreeTableView<S>, TreeTableRow<S>> value) Sets the value of therowFactoryproperty.final voidSets theMultipleSelectionModelto be used in the TreeTableView.final voidsetShowRoot(boolean value) Specifies whether the rootTreeItemshould be shown within this TreeTableView.final voidsetSortMode(TreeSortMode value) Sets the value of thesortModeproperty.final voidsetSortPolicy(Callback<TreeTableView<S>, Boolean> callback) Sets the value of thesortPolicyproperty.final voidsetTableMenuButtonVisible(boolean value) Sets the value of thetableMenuButtonVisibleproperty.final voidsetTreeColumn(TreeTableColumn<S, ?> value) Sets the value of thetreeColumnproperty.final BooleanPropertyProperty that represents whether or not the TreeTableView root node is visible.voidsort()The sort method forces the TreeTableView to re-run its sorting algorithm.final ObjectProperty<TreeSortMode> Specifies the sort mode to use when sorting the contents of this TreeTableView, should any columns be specified in thesort orderlist.final ObjectProperty<Callback<TreeTableView<S>, Boolean>> The sort policy specifies how sorting in this TreeTableView should be performed.final BooleanPropertyThis controls whether a menu button is available when the user clicks in a designated space within the TableView, within which is a radio menu item for each TreeTableColumn in this table.final ObjectProperty<TreeTableColumn<S, ?>> Property that represents which column should have the disclosure node shown in it (that is, the column with the arrow).Methods declared in class javafx.scene.control.Control
computeMaxHeight, computeMaxWidth, computeMinHeight, computeMinWidth, contextMenuProperty, createDefaultSkin, getContextMenu, getCssMetaData, getInitialFocusTraversable, getSkin, getTooltip, isResizable, setContextMenu, setSkin, setTooltip, skinProperty, tooltipPropertyMethods declared in class javafx.scene.layout.Region
backgroundProperty, borderProperty, cacheShapeProperty, centerShapeProperty, computePrefHeight, computePrefWidth, getBackground, getBorder, getHeight, getInsets, getMaxHeight, getMaxWidth, getMinHeight, getMinWidth, getOpaqueInsets, getPadding, getPrefHeight, getPrefWidth, getShape, getUserAgentStylesheet, getWidth, heightProperty, insetsProperty, isCacheShape, isCenterShape, isScaleShape, isSnapToPixel, layoutInArea, layoutInArea, layoutInArea, layoutInArea, maxHeight, maxHeightProperty, maxWidth, maxWidthProperty, minHeight, minHeightProperty, minWidth, minWidthProperty, opaqueInsetsProperty, paddingProperty, positionInArea, positionInArea, prefHeight, prefHeightProperty, prefWidth, prefWidthProperty, resize, scaleShapeProperty, setBackground, setBorder, setCacheShape, setCenterShape, setHeight, setMaxHeight, setMaxSize, setMaxWidth, setMinHeight, setMinSize, setMinWidth, setOpaqueInsets, setPadding, setPrefHeight, setPrefSize, setPrefWidth, setScaleShape, setShape, setSnapToPixel, setWidth, shapeProperty, snappedBottomInset, snappedLeftInset, snappedRightInset, snappedTopInset, snapPosition, snapPositionX, snapPositionY, snapSize, snapSizeX, snapSizeY, snapSpace, snapSpaceX, snapSpaceY, snapToPixelProperty, widthPropertyMethods declared in class javafx.scene.Parent
getBaselineOffset, getChildren, getChildrenUnmodifiable, getManagedChildren, getStylesheets, isNeedsLayout, layout, layoutChildren, needsLayoutProperty, requestLayout, requestParentLayout, setNeedsLayout, updateBoundsMethods declared in class javafx.scene.Node
accessibleHelpProperty, accessibleRoleDescriptionProperty, accessibleRoleProperty, accessibleTextProperty, addEventFilter, addEventHandler, applyCss, autosize, blendModeProperty, boundsInLocalProperty, boundsInParentProperty, buildEventDispatchChain, cacheHintProperty, cacheProperty, clipProperty, computeAreaInScreen, contains, contains, cursorProperty, depthTestProperty, disabledProperty, disableProperty, effectiveNodeOrientationProperty, effectProperty, eventDispatcherProperty, executeAccessibleAction, fireEvent, focusedProperty, focusTraversableProperty, focusVisibleProperty, focusWithinProperty, getAccessibleHelp, getAccessibleRole, getAccessibleRoleDescription, getAccessibleText, getBlendMode, getBoundsInLocal, getBoundsInParent, getCacheHint, getClip, getContentBias, getCursor, getDepthTest, getEffect, getEffectiveNodeOrientation, getEventDispatcher, getId, getInitialCursor, getInputMethodRequests, getLayoutBounds, getLayoutX, getLayoutY, getLocalToParentTransform, getLocalToSceneTransform, getNodeOrientation, getOnContextMenuRequested, getOnDragDetected, getOnDragDone, getOnDragDropped, getOnDragEntered, getOnDragExited, getOnDragOver, getOnInputMethodTextChanged, getOnKeyPressed, getOnKeyReleased, getOnKeyTyped, getOnMouseClicked, getOnMouseDragEntered, getOnMouseDragExited, getOnMouseDragged, getOnMouseDragOver, getOnMouseDragReleased, getOnMouseEntered, getOnMouseExited, getOnMouseMoved, getOnMousePressed, getOnMouseReleased, getOnRotate, getOnRotationFinished, getOnRotationStarted, getOnScroll, getOnScrollFinished, getOnScrollStarted, getOnSwipeDown, getOnSwipeLeft, getOnSwipeRight, getOnSwipeUp, getOnTouchMoved, getOnTouchPressed, getOnTouchReleased, getOnTouchStationary, getOnZoom, getOnZoomFinished, getOnZoomStarted, getOpacity, getParent, getProperties, getPseudoClassStates, getRotate, getRotationAxis, getScaleX, getScaleY, getScaleZ, getScene, getStyle, getStyleableParent, getStyleClass, getTransforms, getTranslateX, getTranslateY, getTranslateZ, getTypeSelector, getUserData, getViewOrder, hasProperties, hoverProperty, idProperty, inputMethodRequestsProperty, intersects, intersects, isCache, isDisable, isDisabled, isFocused, isFocusTraversable, isFocusVisible, isFocusWithin, isHover, isManaged, isMouseTransparent, isPickOnBounds, isPressed, isVisible, layoutBoundsProperty, layoutXProperty, layoutYProperty, localToParent, localToParent, localToParent, localToParent, localToParent, localToParentTransformProperty, localToScene, localToScene, localToScene, localToScene, localToScene, localToScene, localToScene, localToScene, localToScene, localToScene, localToSceneTransformProperty, localToScreen, localToScreen, localToScreen, localToScreen, localToScreen, lookup, lookupAll, managedProperty, mouseTransparentProperty, nodeOrientationProperty, notifyAccessibleAttributeChanged, onContextMenuRequestedProperty, onDragDetectedProperty, onDragDoneProperty, onDragDroppedProperty, onDragEnteredProperty, onDragExitedProperty, onDragOverProperty, onInputMethodTextChangedProperty, onKeyPressedProperty, onKeyReleasedProperty, onKeyTypedProperty, onMouseClickedProperty, onMouseDragEnteredProperty, onMouseDragExitedProperty, onMouseDraggedProperty, onMouseDragOverProperty, onMouseDragReleasedProperty, onMouseEnteredProperty, onMouseExitedProperty, onMouseMovedProperty, onMousePressedProperty, onMouseReleasedProperty, onRotateProperty, onRotationFinishedProperty, onRotationStartedProperty, onScrollFinishedProperty, onScrollProperty, onScrollStartedProperty, onSwipeDownProperty, onSwipeLeftProperty, onSwipeRightProperty, onSwipeUpProperty, onTouchMovedProperty, onTouchPressedProperty, onTouchReleasedProperty, onTouchStationaryProperty, onZoomFinishedProperty, onZoomProperty, onZoomStartedProperty, opacityProperty, parentProperty, parentToLocal, parentToLocal, parentToLocal, parentToLocal, parentToLocal, pickOnBoundsProperty, pressedProperty, pseudoClassStateChanged, queryAccessibleAttribute, relocate, removeEventFilter, removeEventHandler, requestFocus, requestFocusTraversal, resizeRelocate, rotateProperty, rotationAxisProperty, scaleXProperty, scaleYProperty, scaleZProperty, sceneProperty, sceneToLocal, sceneToLocal, sceneToLocal, sceneToLocal, sceneToLocal, sceneToLocal, sceneToLocal, sceneToLocal, screenToLocal, screenToLocal, screenToLocal, setAccessibleHelp, setAccessibleRole, setAccessibleRoleDescription, setAccessibleText, setBlendMode, setCache, setCacheHint, setClip, setCursor, setDepthTest, setDisable, setDisabled, setEffect, setEventDispatcher, setEventHandler, setFocused, setFocusTraversable, setHover, setId, setInputMethodRequests, setLayoutX, setLayoutY, setManaged, setMouseTransparent, setNodeOrientation, setOnContextMenuRequested, setOnDragDetected, setOnDragDone, setOnDragDropped, setOnDragEntered, setOnDragExited, setOnDragOver, setOnInputMethodTextChanged, setOnKeyPressed, setOnKeyReleased, setOnKeyTyped, setOnMouseClicked, setOnMouseDragEntered, setOnMouseDragExited, setOnMouseDragged, setOnMouseDragOver, setOnMouseDragReleased, setOnMouseEntered, setOnMouseExited, setOnMouseMoved, setOnMousePressed, setOnMouseReleased, setOnRotate, setOnRotationFinished, setOnRotationStarted, setOnScroll, setOnScrollFinished, setOnScrollStarted, setOnSwipeDown, setOnSwipeLeft, setOnSwipeRight, setOnSwipeUp, setOnTouchMoved, setOnTouchPressed, setOnTouchReleased, setOnTouchStationary, setOnZoom, setOnZoomFinished, setOnZoomStarted, setOpacity, setPickOnBounds, setPressed, setRotate, setRotationAxis, setScaleX, setScaleY, setScaleZ, setStyle, setTranslateX, setTranslateY, setTranslateZ, setUserData, setViewOrder, setVisible, snapshot, snapshot, startDragAndDrop, startFullDrag, styleProperty, toBack, toFront, toString, translateXProperty, translateYProperty, translateZProperty, usesMirroring, viewOrderProperty, visiblePropertyMethods declared in class java.lang.Object
clone, equals, finalize, getClass, hashCode, notify, notifyAll, wait, wait, waitMethods declared in interface javafx.css.Styleable
getStyleableNode
-
Property Details
-
root
Property representing the root node of the TreeTableView.- See Also:
-
showRoot
Property that represents whether or not the TreeTableView root node is visible.- See Also:
-
treeColumn
Property that represents which column should have the disclosure node shown in it (that is, the column with the arrow). By default this will be the left-most column if this property is null, otherwise it will be the specified column assuming it is non-null and contained within thevisible leaf columnslist.- See Also:
-
selectionModel
The SelectionModel provides the API through which it is possible to select single or multiple items within a TreeTableView, as well as inspect which rows have been selected by the user. Note that it has a generic type that must match the type of the TreeTableView itself.- See Also:
-
focusModel
The FocusModel provides the API through which it is possible to control focus on zero or one rows of the TreeTableView. Generally the default implementation should be more than sufficient.- See Also:
-
expandedItemCount
Represents the number of tree nodes presently able to be visible in the TreeTableView. This is essentially the count of all expanded tree items, and their children.
For example, if just the root node is visible, the expandedItemCount will be one. If the root had three children and the root was expanded, the value will be four.
- See Also:
-
editable
Specifies whether this TreeTableView is editable - only if the TreeTableView and the TreeCells within it are both editable will a TreeCell be able to go into their editing state.- See Also:
-
editingCell
Represents the current cell being edited, or null if there is no cell being edited.- See Also:
-
tableMenuButtonVisible
This controls whether a menu button is available when the user clicks in a designated space within the TableView, within which is a radio menu item for each TreeTableColumn in this table. This menu allows for the user to show and hide all TreeTableColumns easily.- See Also:
-
columnResizePolicy
public final ObjectProperty<Callback<TreeTableView.ResizeFeatures,Boolean>> columnResizePolicyPropertyThis is the function called when the user completes a column-resize operation. The two most common policies are available as static functions in the TableView class:UNCONSTRAINED_RESIZE_POLICYandCONSTRAINED_RESIZE_POLICY.- See Also:
-
rowFactory
A function which produces a TreeTableRow. The system is responsible for reusing TreeTableRows. Return from this function a TreeTableRow which might be usable for representing a single row in a TableView.Note that a TreeTableRow is not a TableCell. A TreeTableRow is simply a container for a TableCell, and in most circumstances it is more likely that you'll want to create custom TableCells, rather than TreeTableRows. The primary use case for creating custom TreeTableRow instances would most probably be to introduce some form of column spanning support.
You can create custom TableCell instances per column by assigning the appropriate function to the cellFactory property in the TreeTableColumn class.
- See Also:
-
placeholder
This Node is shown to the user when the table has no content to show. This may be the case because the table model has no data in the first place, that a filter has been applied to the table model, resulting in there being nothing to show the user, or that there are no currently visible columns.- See Also:
-
fixedCellSize
Specifies whether this control has cells that are a fixed height (of the specified value). If this value is less than or equal to zero, then all cells are individually sized and positioned. This is a slow operation. Therefore, when performance matters and developers are not dependent on variable cell sizes it is a good idea to set the fixed cell size value. Generally cells are around 24px, so setting a fixed cell size of 24 is likely to result in very little difference in visuals, but a improvement to performance.To set this property via CSS, use the -fx-fixed-cell-size property. This should not be confused with the -fx-cell-size property. The difference between these two CSS properties is that -fx-cell-size will size all cells to the specified size, but it will not enforce that this is the only size (thus allowing for variable cell sizes, and preventing the performance gains from being possible). Therefore, when performance matters use -fx-fixed-cell-size, instead of -fx-cell-size. If both properties are specified in CSS, -fx-fixed-cell-size takes precedence.
- Since:
- JavaFX 8.0
- See Also:
-
sortMode
Specifies the sort mode to use when sorting the contents of this TreeTableView, should any columns be specified in thesort orderlist.- See Also:
-
comparator
The comparator property is a read-only property that is representative of the current state of thesort orderlist. The sort order list contains the columns that have been added to it either programmatically or via a user clicking on the headers themselves.- See Also:
-
sortPolicy
The sort policy specifies how sorting in this TreeTableView should be performed. For example, a basic sort policy may just recursively sort the children of the root tree item, whereas a more advanced sort policy may call to a database to perform the necessary sorting on the server-side.TreeTableView ships with a
default
 sort policy
that does precisely as mentioned above: it simply attempts to sort the tree hierarchy in-place.It is recommended that rather than override the
sortmethod that a different sort policy be provided instead.- See Also:
-
onSort
Called when there's a request to sort the control.- See Also:
-
onScrollTo
Called when there's a request to scroll an index into view usingscrollTo(int)- See Also:
-
onScrollToColumn
public final ObjectProperty<EventHandler<ScrollToEvent<TreeTableColumn<S,?>>>> onScrollToColumnPropertyCalled when there's a request to scroll a column into view usingscrollToColumn(TreeTableColumn)orscrollToColumnIndex(int)- See Also:
-
-
Field Details
-
UNCONSTRAINED_RESIZE_POLICY
Very simple resize policy that just resizes the specified column by the provided delta and shifts all other columns (to the right of the given column) further to the right (when the delta is positive) or to the left (when the delta is negative).
It also handles the case where we have nested columns by sharing the new space, or subtracting the removed space, evenly between all immediate children columns. Of course, the immediate children may themselves be nested, and they would then use this policy on their children.
-
CONSTRAINED_RESIZE_POLICY_ALL_COLUMNS
public static final Callback<TreeTableView.ResizeFeatures,Boolean> CONSTRAINED_RESIZE_POLICY_ALL_COLUMNSA resize policy that adjusts other columns in order to fit the tree table width. During UI adjustment, proportionately resizes all columns to preserve the total width.When column constraints make it impossible to fit all the columns into the allowed area, the columns are either clipped, or an empty space appears. This policy disables the horizontal scroll bar.
- Since:
- 20
-
CONSTRAINED_RESIZE_POLICY_LAST_COLUMN
public static final Callback<TreeTableView.ResizeFeatures,Boolean> CONSTRAINED_RESIZE_POLICY_LAST_COLUMNA resize policy that adjusts the last column in order to fit the tree table width. During UI adjustment, resizes the last column only to preserve the total width.When column constraints make it impossible to fit all the columns into the allowed area, the columns are either clipped, or an empty space appears. This policy disables the horizontal scroll bar.
- Since:
- 20
-
CONSTRAINED_RESIZE_POLICY_NEXT_COLUMN
public static final Callback<TreeTableView.ResizeFeatures,Boolean> CONSTRAINED_RESIZE_POLICY_NEXT_COLUMNA resize policy that adjusts the next column in order to fit the tree table width. During UI adjustment, resizes the next column the opposite way.When column constraints make it impossible to fit all the columns into the allowed area, the columns are either clipped, or an empty space appears. This policy disables the horizontal scroll bar.
- Since:
- 20
-
CONSTRAINED_RESIZE_POLICY_SUBSEQUENT_COLUMNS
public static final Callback<TreeTableView.ResizeFeatures,Boolean> CONSTRAINED_RESIZE_POLICY_SUBSEQUENT_COLUMNSA resize policy that adjusts subsequent columns in order to fit the tree table width. During UI adjustment, proportionally resizes subsequent columns to preserve the total width.When column constraints make it impossible to fit all the columns into the allowed area, the columns are either clipped, or an empty space appears. This policy disables the horizontal scroll bar.
- Since:
- 20
-
CONSTRAINED_RESIZE_POLICY_FLEX_NEXT_COLUMN
public static final Callback<TreeTableView.ResizeFeatures,Boolean> CONSTRAINED_RESIZE_POLICY_FLEX_NEXT_COLUMNA resize policy that adjusts columns, starting with the next one, in order to fit the tree table width. During UI adjustment, resizes the next column to preserve the total width. When the next column cannot be further resized due to a constraint, the following column gets resized, and so on.When column constraints make it impossible to fit all the columns into the allowed area, the columns are either clipped, or an empty space appears. This policy disables the horizontal scroll bar.
- Since:
- 20
-
CONSTRAINED_RESIZE_POLICY_FLEX_LAST_COLUMN
public static final Callback<TreeTableView.ResizeFeatures,Boolean> CONSTRAINED_RESIZE_POLICY_FLEX_LAST_COLUMNA resize policy that adjusts columns, starting with the last one, in order to fit the table width. During UI adjustment, resizes the last column to preserve the total width. When the last column cannot be further resized due to a constraint, the column preceding the last one gets resized, and so on.When column constraints make it impossible to fit all the columns into the allowed area, the columns are either clipped, or an empty space appears. This policy disables the horizontal scroll bar.
- Since:
- 20
-
CONSTRAINED_RESIZE_POLICY
@Deprecated(since="20") public static final Callback<TreeTableView.ResizeFeatures,Boolean> CONSTRAINED_RESIZE_POLICYDeprecated.UseCONSTRAINED_RESIZE_POLICY_FLEX_LAST_COLUMNinstead.Simple policy that ensures the width of all visible leaf columns in this table sum up to equal the width of the table itself.
When the user resizes a column width with this policy, the table automatically adjusts the width of the right hand side columns. When the user increases a column width, the table decreases the width of the rightmost column until it reaches its minimum width. Then it decreases the width of the second rightmost column until it reaches minimum width and so on. When all right hand side columns reach minimum size, the user cannot increase the size of resized column any more.
-
DEFAULT_SORT_POLICY
The defaultsort policythat this TreeTableView will use if no other policy is specified. The sort policy is a simpleCallbackthat accepts a TreeTableView as the sole argument and expects a Boolean response representing whether the sort succeeded or not. A Boolean response of true represents success, and a response of false (or null) will be considered to represent failure.
-
-
Constructor Details
-
TreeTableView
public TreeTableView()Creates an empty TreeTableView.Refer to the
TreeTableViewclass documentation for details on the default state of other properties. -
TreeTableView
Creates a TreeTableView with the provided root node.Refer to the
TreeTableViewclass documentation for details on the default state of other properties.- Parameters:
root- The node to be the root in this TreeTableView.
-
-
Method Details
-
editAnyEvent
An EventType that indicates some edit event has occurred. It is the parent type of all other edit events:editStartEvent(),editCommitEvent()andeditCancelEvent().- Type Parameters:
S- The type of the TreeItem instances used in this TreeTableView- Returns:
- An EventType that indicates some edit event has occurred
-
editStartEvent
An EventType used to indicate that an edit event has started within the TreeTableView upon which the event was fired.- Type Parameters:
S- The type of the TreeItem instances used in this TreeTableView- Returns:
- An EventType used to indicate that an edit event has started
-
editCancelEvent
An EventType used to indicate that an edit event has just been canceled within the TreeTableView upon which the event was fired.- Type Parameters:
S- The type of the TreeItem instances used in this TreeTableView- Returns:
- An EventType used to indicate that an edit event has just been canceled
-
editCommitEvent
An EventType that is used to indicate that an edit in a TreeTableView has been committed. This means that user has made changes to the data of a TreeItem, and that the UI should be updated.- Type Parameters:
S- The type of the TreeItem instances used in this TreeTableView- Returns:
- An EventType that is used to indicate that an edit in a TreeTableView has been committed
-
getNodeLevel
Deprecated.This method does not correctly calculate the distance from the given TreeItem to the root of the TreeTableView. As of JavaFX 8.0_20, the proper way to do this is viagetTreeItemLevel(TreeItem)Returns the number of levels of 'indentation' of the given TreeItem, based on how many timesTreeItem.getParent()can be recursively called. If the TreeItem does not have any parent set, the returned value will be zero. For each time getParent() is recursively called, the returned value is incremented by one.Important note: This method is deprecated as it does not consider the root node. This means that this method will iterate past the root node of the TreeTableView control, if the root node has a parent. If this is important, call
getTreeItemLevel(TreeItem)instead.- Parameters:
node- The TreeItem for which the level is needed.- Returns:
- An integer representing the number of parents above the given node, or -1 if the given TreeItem is null.
-
setRoot
-
getRoot
-
rootProperty
Property representing the root node of the TreeTableView.- Returns:
- the root property
- See Also:
-
setShowRoot
public final void setShowRoot(boolean value) Specifies whether the rootTreeItemshould be shown within this TreeTableView.- Parameters:
value- If true, the root TreeItem will be shown, and if false it will be hidden.
-
isShowRoot
public final boolean isShowRoot()Returns true if the root of the TreeTableView should be shown, and false if it should not. By default, the root TreeItem is visible in the TreeTableView.- Returns:
- true if the root of the TreeTableView should be shown
-
showRootProperty
Property that represents whether or not the TreeTableView root node is visible.- Returns:
- the show root property
- See Also:
-
treeColumnProperty
Property that represents which column should have the disclosure node shown in it (that is, the column with the arrow). By default this will be the left-most column if this property is null, otherwise it will be the specified column assuming it is non-null and contained within thevisible leaf columnslist.- Returns:
- the tree column property
- See Also:
-
setTreeColumn
Sets the value of thetreeColumnproperty.- Property description:
- Property that represents which column should have the disclosure node
shown in it (that is, the column with the arrow). By default this will be
the left-most column if this property is null, otherwise it will be the
specified column assuming it is non-null and contained within the
visible leaf columnslist. - Parameters:
value- the value for thetreeColumnproperty- See Also:
-
getTreeColumn
Gets the value of thetreeColumnproperty.- Property description:
- Property that represents which column should have the disclosure node
shown in it (that is, the column with the arrow). By default this will be
the left-most column if this property is null, otherwise it will be the
specified column assuming it is non-null and contained within the
visible leaf columnslist. - Returns:
- the value of the
treeColumnproperty - See Also:
-
setSelectionModel
Sets theMultipleSelectionModelto be used in the TreeTableView. Despite a TreeTableView requiring aMultipleSelectionModel, it is possible to configure it to only allow single selection (seeMultipleSelectionModel.setSelectionMode(javafx.scene.control.SelectionMode)for more information).- Parameters:
value- theMultipleSelectionModelto be used
-
getSelectionModel
Returns the currently installed selection model.- Returns:
- the currently installed selection model
-
selectionModelProperty
The SelectionModel provides the API through which it is possible to select single or multiple items within a TreeTableView, as well as inspect which rows have been selected by the user. Note that it has a generic type that must match the type of the TreeTableView itself.- Returns:
- the selection model property
- See Also:
-
setFocusModel
Sets theFocusModelto be used in the TreeTableView.- Parameters:
value- theFocusModelto be used
-
getFocusModel
Returns the currently installedFocusModel.- Returns:
- the currently installed
FocusModel
-
focusModelProperty
The FocusModel provides the API through which it is possible to control focus on zero or one rows of the TreeTableView. Generally the default implementation should be more than sufficient.- Returns:
- the focus model property
- See Also:
-
expandedItemCountProperty
Represents the number of tree nodes presently able to be visible in the TreeTableView. This is essentially the count of all expanded tree items, and their children.
For example, if just the root node is visible, the expandedItemCount will be one. If the root had three children and the root was expanded, the value will be four.
- Returns:
- the
expandedItemCountproperty - See Also:
-
getExpandedItemCount
public final int getExpandedItemCount()Gets the value of theexpandedItemCountproperty.- Property description:
Represents the number of tree nodes presently able to be visible in the TreeTableView. This is essentially the count of all expanded tree items, and their children.
For example, if just the root node is visible, the expandedItemCount will be one. If the root had three children and the root was expanded, the value will be four.
- Returns:
- the value of the
expandedItemCountproperty - See Also:
-
setEditable
public final void setEditable(boolean value) Sets the value of theeditableproperty.- Property description:
- Specifies whether this TreeTableView is editable - only if the TreeTableView and the TreeCells within it are both editable will a TreeCell be able to go into their editing state.
- Parameters:
value- the value for theeditableproperty- See Also:
-
isEditable
public final boolean isEditable()Gets the value of theeditableproperty.- Property description:
- Specifies whether this TreeTableView is editable - only if the TreeTableView and the TreeCells within it are both editable will a TreeCell be able to go into their editing state.
- Returns:
- the value of the
editableproperty - See Also:
-
editableProperty
Specifies whether this TreeTableView is editable - only if the TreeTableView and the TreeCells within it are both editable will a TreeCell be able to go into their editing state.- Returns:
- the editable property
- See Also:
-
getEditingCell
Gets the value of theeditingCellproperty.- Property description:
- Represents the current cell being edited, or null if there is no cell being edited.
- Returns:
- the value of the
editingCellproperty - See Also:
-
editingCellProperty
Represents the current cell being edited, or null if there is no cell being edited.- Returns:
- the editing cell property
- See Also:
-
tableMenuButtonVisibleProperty
This controls whether a menu button is available when the user clicks in a designated space within the TableView, within which is a radio menu item for each TreeTableColumn in this table. This menu allows for the user to show and hide all TreeTableColumns easily.- Returns:
- the table menu button visible property
- See Also:
-
setTableMenuButtonVisible
public final void setTableMenuButtonVisible(boolean value) Sets the value of thetableMenuButtonVisibleproperty.- Property description:
- This controls whether a menu button is available when the user clicks in a designated space within the TableView, within which is a radio menu item for each TreeTableColumn in this table. This menu allows for the user to show and hide all TreeTableColumns easily.
- Parameters:
value- the value for thetableMenuButtonVisibleproperty- See Also:
-
isTableMenuButtonVisible
public final boolean isTableMenuButtonVisible()Gets the value of thetableMenuButtonVisibleproperty.- Property description:
- This controls whether a menu button is available when the user clicks in a designated space within the TableView, within which is a radio menu item for each TreeTableColumn in this table. This menu allows for the user to show and hide all TreeTableColumns easily.
- Returns:
- the value of the
tableMenuButtonVisibleproperty - See Also:
-
setColumnResizePolicy
Sets the value of thecolumnResizePolicyproperty.- Property description:
- This is the function called when the user completes a column-resize
operation. The two most common policies are available as static functions
in the TableView class:
UNCONSTRAINED_RESIZE_POLICYandCONSTRAINED_RESIZE_POLICY. - Parameters:
callback- the value for thecolumnResizePolicyproperty- See Also:
-
getColumnResizePolicy
Gets the value of thecolumnResizePolicyproperty.- Property description:
- This is the function called when the user completes a column-resize
operation. The two most common policies are available as static functions
in the TableView class:
UNCONSTRAINED_RESIZE_POLICYandCONSTRAINED_RESIZE_POLICY. - Returns:
- the value of the
columnResizePolicyproperty - See Also:
-
columnResizePolicyProperty
public final ObjectProperty<Callback<TreeTableView.ResizeFeatures,Boolean>> columnResizePolicyProperty()This is the function called when the user completes a column-resize operation. The two most common policies are available as static functions in the TableView class:UNCONSTRAINED_RESIZE_POLICYandCONSTRAINED_RESIZE_POLICY.- Returns:
- the column resize policy property
- See Also:
-
rowFactoryProperty
A function which produces a TreeTableRow. The system is responsible for reusing TreeTableRows. Return from this function a TreeTableRow which might be usable for representing a single row in a TableView.Note that a TreeTableRow is not a TableCell. A TreeTableRow is simply a container for a TableCell, and in most circumstances it is more likely that you'll want to create custom TableCells, rather than TreeTableRows. The primary use case for creating custom TreeTableRow instances would most probably be to introduce some form of column spanning support.
You can create custom TableCell instances per column by assigning the appropriate function to the cellFactory property in the TreeTableColumn class.
- Returns:
- the row factory property
- See Also:
-
setRowFactory
Sets the value of therowFactoryproperty.- Property description:
- A function which produces a TreeTableRow. The system is responsible for
reusing TreeTableRows. Return from this function a TreeTableRow which
might be usable for representing a single row in a TableView.
Note that a TreeTableRow is not a TableCell. A TreeTableRow is simply a container for a TableCell, and in most circumstances it is more likely that you'll want to create custom TableCells, rather than TreeTableRows. The primary use case for creating custom TreeTableRow instances would most probably be to introduce some form of column spanning support.
You can create custom TableCell instances per column by assigning the appropriate function to the cellFactory property in the TreeTableColumn class.
- Parameters:
value- the value for therowFactoryproperty- See Also:
-
getRowFactory
Gets the value of therowFactoryproperty.- Property description:
- A function which produces a TreeTableRow. The system is responsible for
reusing TreeTableRows. Return from this function a TreeTableRow which
might be usable for representing a single row in a TableView.
Note that a TreeTableRow is not a TableCell. A TreeTableRow is simply a container for a TableCell, and in most circumstances it is more likely that you'll want to create custom TableCells, rather than TreeTableRows. The primary use case for creating custom TreeTableRow instances would most probably be to introduce some form of column spanning support.
You can create custom TableCell instances per column by assigning the appropriate function to the cellFactory property in the TreeTableColumn class.
- Returns:
- the value of the
rowFactoryproperty - See Also:
-
placeholderProperty
This Node is shown to the user when the table has no content to show. This may be the case because the table model has no data in the first place, that a filter has been applied to the table model, resulting in there being nothing to show the user, or that there are no currently visible columns.- Returns:
- the placeholder property
- See Also:
-
setPlaceholder
Sets the value of theplaceholderproperty.- Property description:
- This Node is shown to the user when the table has no content to show. This may be the case because the table model has no data in the first place, that a filter has been applied to the table model, resulting in there being nothing to show the user, or that there are no currently visible columns.
- Parameters:
value- the value for theplaceholderproperty- See Also:
-
getPlaceholder
Gets the value of theplaceholderproperty.- Property description:
- This Node is shown to the user when the table has no content to show. This may be the case because the table model has no data in the first place, that a filter has been applied to the table model, resulting in there being nothing to show the user, or that there are no currently visible columns.
- Returns:
- the value of the
placeholderproperty - See Also:
-
setFixedCellSize
public final void setFixedCellSize(double value) Sets the new fixed cell size for this control. Any value greater than zero will enable fixed cell size mode, whereas a zero or negative value (or Region.USE_COMPUTED_SIZE) will be used to disabled fixed cell size mode.- Parameters:
value- The new fixed cell size value, or a value less than or equal to zero (or Region.USE_COMPUTED_SIZE) to disable.- Since:
- JavaFX 8.0
-
getFixedCellSize
public final double getFixedCellSize()Returns the fixed cell size value. A value less than or equal to zero is used to represent that fixed cell size mode is disabled, and a value greater than zero represents the size of all cells in this control.- Returns:
- A double representing the fixed cell size of this control, or a value less than or equal to zero if fixed cell size mode is disabled.
- Since:
- JavaFX 8.0
-
fixedCellSizeProperty
Specifies whether this control has cells that are a fixed height (of the specified value). If this value is less than or equal to zero, then all cells are individually sized and positioned. This is a slow operation. Therefore, when performance matters and developers are not dependent on variable cell sizes it is a good idea to set the fixed cell size value. Generally cells are around 24px, so setting a fixed cell size of 24 is likely to result in very little difference in visuals, but a improvement to performance.To set this property via CSS, use the -fx-fixed-cell-size property. This should not be confused with the -fx-cell-size property. The difference between these two CSS properties is that -fx-cell-size will size all cells to the specified size, but it will not enforce that this is the only size (thus allowing for variable cell sizes, and preventing the performance gains from being possible). Therefore, when performance matters use -fx-fixed-cell-size, instead of -fx-cell-size. If both properties are specified in CSS, -fx-fixed-cell-size takes precedence.
- Returns:
- the fixed cell size property
- Since:
- JavaFX 8.0
- See Also:
-
sortModeProperty
Specifies the sort mode to use when sorting the contents of this TreeTableView, should any columns be specified in thesort orderlist.- Returns:
- the
sortModeproperty - See Also:
-
setSortMode
Sets the value of thesortModeproperty.- Property description:
- Specifies the sort mode to use when sorting the contents of this TreeTableView,
should any columns be specified in the
sort orderlist. - Parameters:
value- the value for thesortModeproperty- See Also:
-
getSortMode
Gets the value of thesortModeproperty.- Property description:
- Specifies the sort mode to use when sorting the contents of this TreeTableView,
should any columns be specified in the
sort orderlist. - Returns:
- the value of the
sortModeproperty - See Also:
-
getComparator
Gets the value of thecomparatorproperty.- Property description:
- The comparator property is a read-only property that is representative of the
current state of the
sort orderlist. The sort order list contains the columns that have been added to it either programmatically or via a user clicking on the headers themselves. - Returns:
- the value of the
comparatorproperty - See Also:
-
comparatorProperty
The comparator property is a read-only property that is representative of the current state of thesort orderlist. The sort order list contains the columns that have been added to it either programmatically or via a user clicking on the headers themselves.- Returns:
- the
comparatorproperty - See Also:
-
setSortPolicy
Sets the value of thesortPolicyproperty.- Property description:
- The sort policy specifies how sorting in this TreeTableView should be performed.
For example, a basic sort policy may just recursively sort the children of
the root tree item, whereas a more advanced sort policy may call to a
database to perform the necessary sorting on the server-side.
TreeTableView ships with a
default
 sort policy
that does precisely as mentioned above: it simply attempts to sort the tree hierarchy in-place.It is recommended that rather than override the
sortmethod that a different sort policy be provided instead. - Parameters:
callback- the value for thesortPolicyproperty- See Also:
-
getSortPolicy
Gets the value of thesortPolicyproperty.- Property description:
- The sort policy specifies how sorting in this TreeTableView should be performed.
For example, a basic sort policy may just recursively sort the children of
the root tree item, whereas a more advanced sort policy may call to a
database to perform the necessary sorting on the server-side.
TreeTableView ships with a
default
 sort policy
that does precisely as mentioned above: it simply attempts to sort the tree hierarchy in-place.It is recommended that rather than override the
sortmethod that a different sort policy be provided instead. - Returns:
- the value of the
sortPolicyproperty - See Also:
-
sortPolicyProperty
The sort policy specifies how sorting in this TreeTableView should be performed. For example, a basic sort policy may just recursively sort the children of the root tree item, whereas a more advanced sort policy may call to a database to perform the necessary sorting on the server-side.TreeTableView ships with a
default
 sort policy
that does precisely as mentioned above: it simply attempts to sort the tree hierarchy in-place.It is recommended that rather than override the
sortmethod that a different sort policy be provided instead.- Returns:
- the
sortPolicyproperty - See Also:
-
setOnSort
Sets the value of theonSortproperty.- Property description:
- Called when there's a request to sort the control.
- Parameters:
value- the value for theonSortproperty- See Also:
-
getOnSort
Gets the value of theonSortproperty.- Property description:
- Called when there's a request to sort the control.
- Returns:
- the value of the
onSortproperty - See Also:
-
onSortProperty
Called when there's a request to sort the control.- Returns:
- the
onSortproperty - See Also:
-
scrollTo
public void scrollTo(int index) Scrolls the TreeTableView such that the item in the given index is visible to the end user.- Parameters:
index- The index that should be made visible to the user, assuming of course that it is greater than, or equal to 0, and less than the number of the visible items in the TreeTableView.
-
setOnScrollTo
Sets the value of theonScrollToproperty.- Property description:
- Called when there's a request to scroll an index into view using
scrollTo(int) - Parameters:
value- the value for theonScrollToproperty- See Also:
-
getOnScrollTo
Gets the value of theonScrollToproperty.- Property description:
- Called when there's a request to scroll an index into view using
scrollTo(int) - Returns:
- the value of the
onScrollToproperty - See Also:
-
onScrollToProperty
Called when there's a request to scroll an index into view usingscrollTo(int)- Returns:
- the
onScrollToproperty - See Also:
-
scrollToColumn
Scrolls the TreeTableView so that the given column is visible within the viewport.- Parameters:
column- The column that should be visible to the user.
-
scrollToColumnIndex
public void scrollToColumnIndex(int columnIndex) Scrolls the TreeTableView so that the given index is visible within the viewport.- Parameters:
columnIndex- The index of a column that should be visible to the user.
-
setOnScrollToColumn
Sets the value of theonScrollToColumnproperty.- Property description:
- Called when there's a request to scroll a column into view using
scrollToColumn(TreeTableColumn)orscrollToColumnIndex(int) - Parameters:
value- the value for theonScrollToColumnproperty- See Also:
-
getOnScrollToColumn
Gets the value of theonScrollToColumnproperty.- Property description:
- Called when there's a request to scroll a column into view using
scrollToColumn(TreeTableColumn)orscrollToColumnIndex(int) - Returns:
- the value of the
onScrollToColumnproperty - See Also:
-
onScrollToColumnProperty
public final ObjectProperty<EventHandler<ScrollToEvent<TreeTableColumn<S,?>>>> onScrollToColumnProperty()Called when there's a request to scroll a column into view usingscrollToColumn(TreeTableColumn)orscrollToColumnIndex(int)- Returns:
- the
onScrollToColumnproperty - See Also:
-
getRow
Returns the index position of the given TreeItem, assuming that it is currently accessible through the tree hierarchy (most notably, that all parent tree items are expanded). If a parent tree item is collapsed, the result is that this method will return -1 to indicate that the given tree item is not accessible in the tree.- Parameters:
item- The TreeItem for which the index is sought.- Returns:
- An integer representing the location in the current TreeTableView of the first instance of the given TreeItem, or -1 if it is null or can not be found (for example, if a parent (all the way up to the root) is collapsed).
-
getTreeItem
-
getTreeItemLevel
Returns the number of levels of 'indentation' of the given TreeItem, based on how many times getParent() can be recursively called. If the given TreeItem is the root node of this TreeTableView, or if the TreeItem does not have any parent set, the returned value will be zero. For each time getParent() is recursively called, the returned value is incremented by one.- Parameters:
node- The TreeItem for which the level is needed.- Returns:
- An integer representing the number of parents above the given node, or -1 if the given TreeItem is null.
-
getColumns
The TreeTableColumns that are part of this TableView. As the user reorders the TableView columns, this list will be updated to reflect the current visual ordering.Note: to display any data in a TableView, there must be at least one TreeTableColumn in this ObservableList.
- Returns:
- the table table column
-
getSortOrder
The sortOrder list defines the order in whichTreeTableColumninstances are sorted. An empty sortOrder list means that no sorting is being applied on the TableView. If the sortOrder list has one TreeTableColumn within it, the TableView will be sorted using thesortTypeandcomparatorproperties of this TreeTableColumn (assumingTreeTableColumn.sortableis true). If the sortOrder list contains multiple TreeTableColumn instances, then the TableView is firstly sorted based on the properties of the first TreeTableColumn. If two elements are considered equal, then the second TreeTableColumn in the list is used to determine ordering. This repeats until the results from all TreeTableColumn comparators are considered, if necessary.- Returns:
- An ObservableList containing zero or more TreeTableColumn instances.
-
resizeColumn
Applies the currently installed resize policy against the given column, resizing it based on the delta value provided.- Parameters:
column- the columndelta- the delta- Returns:
- true if column resizing is applied
-
edit
Causes the cell at the given row/column view indexes to switch into its editing state, if it is not already in it, and assuming that the TableView and column are also editable.- Parameters:
row- the rowcolumn- the column
-
getVisibleLeafColumns
Returns an unmodifiable list containing the currently visible leaf columns.- Returns:
- an unmodifiable list containing the currently visible leaf columns
-
getVisibleLeafIndex
Returns the position of the given column, relative to all other visible leaf columns.- Parameters:
column- the column- Returns:
- the position of the given column, relative to all other visible leaf columns
-
getVisibleLeafColumn
Returns the TreeTableColumn in the given column index, relative to all other visible leaf columns.- Parameters:
column- the column- Returns:
- the TreeTableColumn in the given column index, relative to all other visible leaf columns
-
sort
public void sort()The sort method forces the TreeTableView to re-run its sorting algorithm. More often than not it is not necessary to call this method directly, as it is automatically called when thesort order,sort policy, or the state of the TreeTableColumnsort typeproperties change. In other words, this method should only be called directly when something external changes and a sort is required. -
refresh
public void refresh()Callingrefresh()forces the TreeTableView control to recreate and repopulate the cells necessary to populate the visual bounds of the control. In other words, this forces the TreeTableView to update what it is showing to the user. This is useful in cases where the underlying data source has changed in a way that is not observed by the TreeTableView itself.- Since:
- JavaFX 8u60
-
getClassCssMetaData
Gets theCssMetaDataassociated with this class, which may include theCssMetaDataof its superclasses.- Returns:
- the
CssMetaData
-
getControlCssMetaData
Gets the unmodifiable list of the control's CSS-styleable properties.- Overrides:
getControlCssMetaDatain classControl- Returns:
- the unmodifiable list of the control's CSS-styleable properties
- Since:
- JavaFX 8.0
-
CONSTRAINED_RESIZE_POLICY_FLEX_LAST_COLUMNinstead.